


Remote Access
Access your remote desktop from any device, anywhere.
 Simon Brown • Jan 8, 2024
It is a common need for every tech user to transfer important files, documents, or media from an old device to a new one. Many users also do this to back up important data in a secure place. It is challenging to safely shift all your data to another device without compromising its integrity. Particularly, when dealing with large files, you can face various barriers.
This article will guide you on how to send large files via email from one device to another. Also, if you stick to the end, you will find a perfect alternative to all these methods for an easy and secure transfer of large files.
Email services often restrict the maximum size of files that can be attached to an email. Email service providers set these limits to ensure smooth transmission. Popular email platforms like Gmail and Outlook typically enforce attachment size limits, usually ranging between 20MB to 25MB per email. Let's explore the limit range most common email services offer in tabular form:
|
Email Service Provider |
Maximum Attachment Size Limit |
|
25MB |
|
|
20MB |
|
|
25MB |
|
|
25MB |
|
|
20MB |
In this section, we'll present effective methods to send large files through email. As previously mentioned, most service providers limit email attachments to sizes under 25MB. These efficient techniques will simplify the sharing of large files. Additionally, we'll explore an alternative method, which is the most effective among these options.
Cloud services such as OneDrive, Dropbox, or Google Drive offer a highly efficient means to transfer files between devices. These tools are very convenient to use and facilitate a smooth data transfer by using email. Below are the steps detailing how to send a large file through email using any of these cloud services:
Step 1: Begin by logging into your account with a Cloud service like Google Drive. You need to open Google Drive on the source device and upload the desired file or folder by selecting the "New" button in the interface's upper left corner. Choose the "File upload" or "Folder upload" option from the drop-down and upload the required file.

Step 2: Subsequently, right-click the uploaded file to open a drop-down menu with various options. Here, place the cursor on “Share” and proceed with the “Share” option.

Step 3: Upon opening the new window, insert your email address in the “Add people and groups” box. Afterward, set the permission as “Editor,” “Commentator,” or “Viewer” as appropriate. Also, check the “Notify people” option and proceed by hitting the "Send" button.

Step 4: Now, access the email account that you have just entered. Head to the "Inbox" section, and you'll find the link to the desired file there, which you can open on the new device or download.

WeTransfer stands out as one of the easiest and most widely used platforms for sending large files. Its free version accommodates file transfers of up to 2 GB in size with no compromise on data security. Notably, WeTransfer offers two simple file transfer options: via email or a transfer link. Discover a step-by-step guide outlining the method to send large files through mail using WeTransfer:
Step 1: First, you must visit the website and simply head to the main interface. Next, locate the upload files section on the left side. Then, tap the "three dots" icon at the bottom left and choose the "Send email transfer" option.

Step 2: Proceed by selecting the "+" icon at the top to initiate uploading of your files. You have to fill in the "Email To" and "Your Email" sections and hit the "Transfer" button to share files via email.

Another simple method to share large files via email is by reducing their size. You can compress the file on your desktop and can share that zipped file via email. To send large files via email, you can follow these steps:
Step 1. Begin by choosing the files you wish to send, whether a single or multiple files. Right-click on the selected files or folder and opt for the "Send to" menu. Next, choose the "Compressed (zipped) Folder" option. This will generate a new compressed (.zip) folder containing your files.

Step 2. Open your email and initiate a new message by clicking "Compose." Use the “Paperclip” icon to add an attachment and locate the compressed file. Select the file, input the recipient's or your email address, and verify all details. Finally, click "Send" to transmit the email with the compressed file.

If you are wondering how to send large files, Avica Remote Desktop stands out as the fastest software for data transfer. Avica provides end to end comprehensive AES-256 encryption. It offers remote device control capabilities, which enable users to manage their devices smoothly. Its patented transfer protocol ensures quick file transfers and allows users to drag and drop files onto remote displays.
Furthermore, Avica has paid and free versions, and both of them support the feature of file transfer. It is 100 times faster than FTP (File Transfer Protocol) and HTTP (Hypertext Transfer Protocol) in terms of speed, which guarantees quick data transfers without compromising security. Also, it allows you to transfer multiple files without limiting their sizes.
Feel free to download Avica products by clicking the button below. If you're seeking additional information about Avica product downloads, you can visit the Avica download page. Rest assured, Avica guarantees the safety and virus-free nature of all products obtained from the official website or app store.
Below are the steps elaborating on how to transfer files using Avica. This guide will provide a clear understanding of accessing Avica and utilizing its features effectively.
Begin by downloading and installing the Avica tool onto both devices. After that, you need to launch the tool and log in with your Avica account.

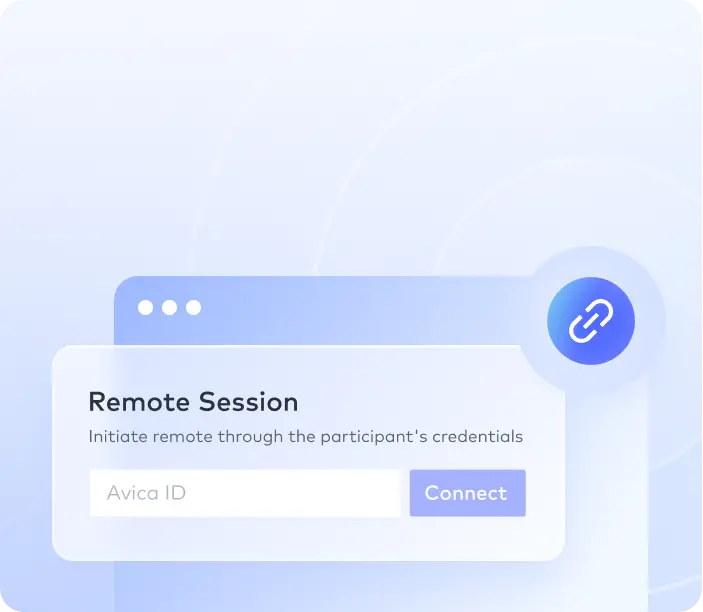
Click on the "Screen" icon located in the top-left corner. Then, enter the details for the remote sessions after enabling remote access by toggling the “Allow remote access to this device via your credentials" switch. You can take note of its "Avica ID" and "Password."
Activate Avica on the other laptop and input the previously noted "Avica ID" into the "Remote Session" designated box. Click the “Connect” button and, if prompted, enter the associated “Password.” This action will open a new window and provide access to various features, including the file transfer feature.

You can make use of Avica's user-friendly features like "drag-and-drop" or the "Clipboard" function. This feature will enable you to copy and transfer files to the remote device. Apart from the “drag-and-drop” feature, you can also access other file transfer functionalities by clicking the "File Transfer" icon situated in the top right corner.

Alternatively, another method can be adopted by selecting the desired device from the "Recent Session" section in the right-side panel. Afterward, you need to click on the “Three Dots” adjacent to the chosen device and proceed to the "File Transfer" option.

Access the file manager, and finally, you can start the file transfer process by clicking the "Send" button after selecting files.

TIPS: To learn more about large file transfer online and offline, explore the 6 free ways to make large file sending easy.
In summary, the process of transferring data between two laptops requires technical expertise. It is important to adopt quicker and safer methods for the efficient completion of this task. This article has covered 3 distinct methods explaining how to send large files over email, along with the bonus tip. Among these options, our top recommendation for file transfer is Avica. Not only does Avica ensure faster file sharing, but it also offers a range of additional features.

Connect Everything, Work Anywhere


