


Remote Access
Access your remote desktop from any device, anywhere.

 File Transfer
 Multi-Monitor Support
 Unattended Access
 Privacy Mode

 Simon Brown • Jan 31, 2024
In educational and work environments, team members or colleagues use different operating systems, hindering seamless project collaboration. To address this issue, many macOS screen-sharing apps are designed to allow individuals to interact with others, regardless of operating system. If you are developing software, screen sharing across operating systems will facilitate coding and debugging.
Apart from that, people can get technical support on their macOS from knowledgeable users through screen sharing. Keeping in view the vast use cases of screen-sharing Mac, several built-in apps have been developed to connect Mac with other Apple devices remotely. If you want to share screens from Mac to other operating systems, read this guide and get a detailed understanding along with the steps.
The answer is yes because you can screen share Mac using built-in apps or other advanced third-party apps. To avoid additional installations, individuals use macOS native screen-sharing apps that are easily accessible to all Mac users. On the contrary, people prefer third-party apps for various features, customizations, and compatibility across devices.
A notable fact is that the native macOS apps can only share screens with Apple devices. For Mac Screen sharing across non-native Apple devices, you have to rely on third-party screen sharing apps.
If you want to temporarily share your macOS desktop screen with other devices but they are far from your physical location, you can use Avica Remote Desktop software. This remote desktop application is compatible with macOS, Android, iOS, and Windows PC to ensure a unified connection across devices. Moreover, Avica is end-to-end encrypted with AES-256 encryption to build a secure remote session.
It has advanced features that adjust the screen display quality from smooth, HD, Ultra HD, and customized options. Other than that, you can set your screen resolution, color, display, and frame rate through a list of FPS options. While screen sharing the Mac with other devices, anyone can witness the speed Avica shows with the patent protocol.
Let us clarify: It can not only share screens but also allow you to control another device remotely during the session. After getting a brief know-how about the Avica remote desktop, it is essential to delve into its given key features for a comprehensive understanding:
Feel free to easily download Avica software by clicking the button below. If you require additional information about Avica product downloads, please visit the dedicated Avica download page. Rest assured, Avica guarantees safety and ensures that all products acquired from their official website or app store are free from viruses. You can confidently download Avica from these trusted sources.
Avica also gives you a privacy mode to restrict others from seeing your activities in the remote connection. To try these exceptional features, learn how to screen share on a Mac in this stepwise guide and establish a remote session:
Download and launch the latest Avica on your Mac and another device. Upon successfully launching, sign into both devices to enter the main interface.

Then, toggle the "Allow Remote Access through this Device via Your Credentials" on your remote macOS device. Afterward, the “Avica ID” and “Password” will appear, which you need to copy and move to your local device.
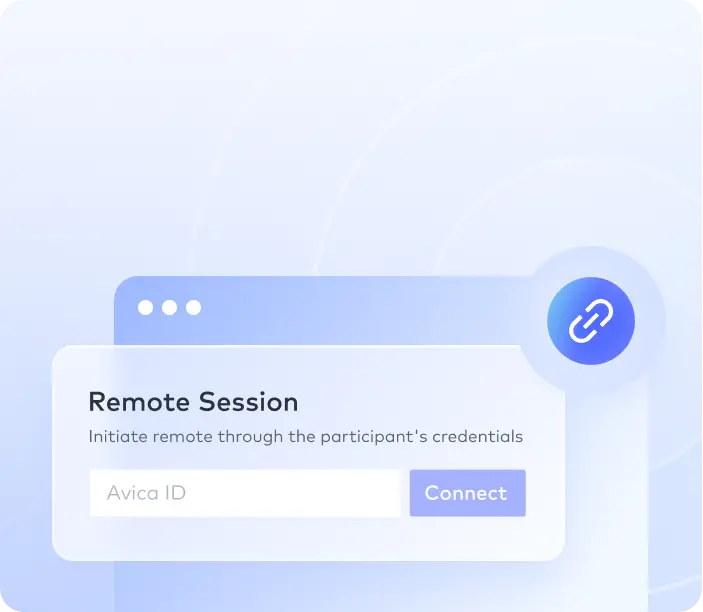
Now, enter the remote macOS device's Avica ID in the text box under "Remote Session" on the local device. Next, press the "Connect" button and insert the Password on the next screen. Again, tap the "Connect" button, and the remote session will be initiated where you can see your MacBook screen on the local device.

As you have established the remote session, you can control the macOS screen. To change display settings, go to the top bar and choose the “Quality” drop-down. Moreover, you can use the "File Transfer," "Chat," and "Privacy Mode" features. If you want to end this remote session, click the red “Clip” icon and proceed with the “End” button.

Apple offers a built-in screen-sharing feature in macOS where you can view others’ MacBooks while the screen is being shared. Using this native technology, you can see, open, move, or close files, windows, and apps through another macOS device. If you want to discover this option on your Mac, follow the simple steps below and learn how to share the screen on your Mac.
Step 1: To start screen sharing on Mac, enable screen sharing on Mac first. For this, click the “Apple” icon and choose the “System Settings” option from the list. Afterward, tap the “General” option from the left side of the screen and navigate to press the “Sharing” feature on the right side.

Toggle the "Screen Sharing" option from the "Content & Media" section. Also, uncheck "Remote Management" from the "Advanced" section because neither process is possible simultaneously.

Step 2: Upon enabling the “Screen Sharing,” hit the “Magnifying Glass” icon from the top right bar to open the “Spotlight Search.” There, type the “Screen Sharing” and press the “Enter” key from the keyboard.

Step 3: From the next screen, tap the "+" icon from the top right corner and enter the "Apple ID" of the host device at the designated place. After adding, hit the "Connect" button, and the host device will receive the requested notification.

Step 4: The host Mac user should click the "Accept" button to allow screen sharing. They can select to enable full-screen access, run applications, or transfer files options. Later, the host device has to choose the "Accept" button, and the remote screen-sharing session on macOS will be initiated.

There are chances that macOS users might fail to establish the screen-sharing session via the built-in tool in Mac due to certain software update issues. In that situation, using the third-party application is the only option left, which can also screen share Mac across other operating systems. However, you should get some knowledge about currently trending screen-sharing software in the following part:
After learning that you can achieve screen-sharing macOS, this article would prove to be a helpful source for launching screen-sharing sessions. Here, you have learned about screen sharing via remote access and through built-in tools of macOS in comprehensive steps. This guide has also shed light on third-party screen-sharing applications to enable you to choose one that meets your needs.
Ultimately, it is proved with facts that Avica is an incredible solution to share screens on macOS with high speed, security, and compatibility. Remarkably, you cannot approach unlimited customization options and remote-control features using screen-sharing apps other than Avica.

Connect Everything, Work Anywhere


